Best Pizza Dough Recipe

Pizza Dough
Pizza Dough

This is a great pizza dough and the key is to let it set overnight. I took the original recipe from the food scientist himself, Alton Brown.  I adjusted it slightly for my own taste and increased the quantity to make two fair sized pizzas. It came out great. Here is the recipe

3 tablespoons sugar
1  tablespoon kosher salt
1 1/2 tablespoon pure olive oil
1  cup warm water (1 1/8 for fluffier crust, 1 more cup if doing large batch)
3 cups bread flour (for bread machines, for healthier crust substitute 1 cup of bread flour with 1 cup of whole wheat flour) (1 more cup of flour for large batch)
1  tablespoon instant yeast
3 teaspoons olive oil
Olive oil, for the pizza crust
Flour, for dusting the pizza peel

Directions

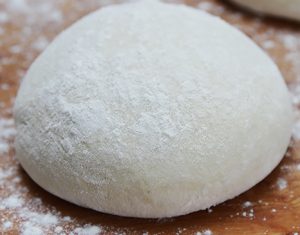
Add 1 slightly warm cup of water to bowl along with 1 tbsp of the sugar and the yeast. Stir and let set while measuring the dry ingredients and putting them into a mixing bowl starting with the flour, then adding remaining 2 tablespoons of sugar and the rest of the dry ingredients on top. Using the paddle attachment mix on low until dry ingredients blended. Now add in yeast and water mixture along with olive oil and mix on low again until the dough comes together. Switch the mixer over to the dough hook attachment and knead for about 15 minutes on medium speed. Take a small piece of the dough and stretch it till thin and hold up to the light. If you have a taut membrane before it tears the dough is ready. If not knead in mixer for another 5-10 minutes and try again. Now pour about 1 tablespoon of olive oil into a bowl add the dough and roll around till coated in olive oil, cover with plastic wrap and put in the refrigerator overnight. Next day remove and let come to room temp. divide in half and roll into two crusts. Sprinkle a thin layer of corn meal on the pizza pan and put the rolled out dough over it and let it set for about 15 mins. Add toppings and bake at 475 to 550 degrees in a pre-heated oven with a pizza stone till edges of the crust turn a deep brown and cheese is melted in the center. See my pizza sauce recipe for a great homemade sauce to go on top.

Customizations:

Softer, Fluffier crust: Add another 1/8 cup of water (1 1/8 cups total)

Chewier Crust and better gluten Devopment Notes:

  • Use 00 Flour to get a less bready crust and more like a Pizzeria
  • Better Gluten development to allow easier stretching of crust and better chew and bubbles
    • Add the water & suga first, mix, then add yeast and flour to the bread maker pan. Run the cycle till the first rest. While the bread maker is in resting period, make a pocket and add the salt and olive oil into the pocket and close the pocket around the salt and oil.
  • Flavor development: Make the day before and let ferment in the fridge overnight. Add 1/2 of the yeast and create the dough. Form into two balls and coat with olive oil, then put in a bowl and cover with saran wrap and set in the fridge overnight. Take out of the fridge 1 hour ahead and let warm to room temp before forming crust. This not only makes the crust chewier, but also improves flavor.

Large Batch:

  • Add 1 more cup of water and 1 more cup of flour. Rest of ingredients do not make a noticeable impact or flavor or quality.

Crispy Bottom:

  • Use Pizza stone as mentioned above. If no pizza peel is available form crust and put onto aluminum foil that has been oiled with olive oil, put foil with crust onto pizza pan and slide onto pizza stone, when removing grab edge of foil not touching pizza stone and slide back onto pizza pan. If no pizza stone is available put crust on foil as if to put onto pizza stone (above) but instead preheat pizza pan in oven then remove pan and put foil with crust onto preheated pizza pan and put back into oven to cook,
Incredible Turkey Breast

Delicious Healthy Turkey Breast

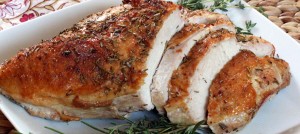
I have made turkeys for a while, at first they always came out dry. This was because by the time the thigh was done the breast was dry. I learned a few keys to making a juicy delicious turkey without soaking in brine. First don’t stuff the turkey and second remove the backbone and flatten the turkey before cooking. this will allow the turkey to cook more evenly. Cook the turkey on a rack such as a cooling rack over a pan and start checking the temperature early.

Ingredients

  • Turkey Breast or whole turkey backbone removed and flattened.
  • 1/2 stick of butter
  • 10-15 fresh sage leaves
  • 1/4 cup roughtly chopped parsley
  • 6-7 large cloves of garlic
  • 1 tsp salt

Directions

Put sage, garlic and parsley in food processor or food chopper. Chop finely. Add butter and salt and chop till mixed well. Remove backbone and flatten turkey breast if whole. This will allow it to cook evenly. Stuff butter under skin and rub on skin. Roast in oven at 325 degrees till breast or thickest part of turkey reaches temp 163 degrees (Temp will rise above 165 degrees when resting). Remove rest for 30 mins. Cut and serve.

Vietnamese Spring Rolls w/spicy dipping sauce


Vietnamese Spring Roll

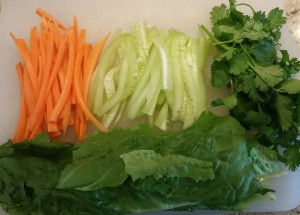
Prepped Vegetables
Prepped Vegetables

Ingredients

Directions

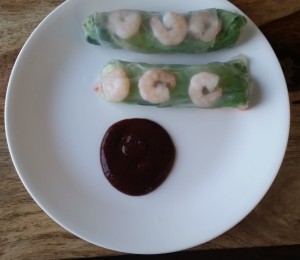
After all the prep is done and the ingredients are ready. Fill a 9×13 cake pan with warm water and take a piece of the rice paper a soak it for about 20 – 40 seconds until it softens then lay the softened rice paper flat on a plate. Put 3-4 of the cooked shrimp across the rice paper, then put the lettuce leafs on top of the shrimp, then the carrot, cucumber, a few mint leaves then about 3 sprigs of cilantro. Pick up one side of the rice paper and gently stretch it over all the items you just stacked on it and try to get it a little tight and start to roll it up. When you have it about half way rolled fold over the sides, then finish rolling it up. It should end up looking like the picture. After you have all the spring rolls done, you can make the sauce. Put one part Hoisin sauce and 3 parts Siracha sauce into a small bowl and mix. Then put some of the sauce on the plate and serve with the spring rolls. For vegan or vegetarian versions just leave out the shrimp.

Habenaro Hot Sauce

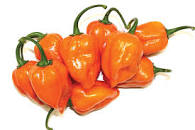
habernaroPepper

Each type of pepper has a different kind of hotness. The habenero gives an in your face kind of hotness. If you like really spicy hot sauce, this is for you.

Ingredients

  • 5 cloves garlic
  • 1 carrot peeled sliced crosswise in about 1/2″ slices
  • 1/2 small brown or yellow onion
  • 5 – 8 orange habenero chiles (stem removed)
  • 1/2 cup white cider vinegar
  • 1/2 tsp salt
  • 1/2 tsp sugar
  • 3 sprigs of cilantro

Directions

In a small pan boil garlic, onion, chiles, carrot, and celantro for about 20 minutes in just enough water to cover them. Use 8 habeneros for mouth scorching hot or 5 for just hot.   Add to food processor along with vinegar and about 1/2 cup of the boiling water. Process until ground into a smooth paste, then bottle. Will stay good in the refrigerator for about 2 months. The heat dissipates some as you store it.

Southwest Tofu Scramble

Delicious Southwest Tofu Scramble

Many times when I want to eat lighter and healthier and cut out meat. During these times when I try to eat more cleanly and this is one of the recipes I turn to. It is so good, and filling and best of all I don’t feel bogged down.

  •  Ingredients
    • 1 package of Extra Firm Tofu (Drained well and broken into pieces)
    • 1/2 of a large onion chopped
    • 1 potato cooked peeled and crumbled(I cooked it in the microwave for about 3.5 minutes)
    • 1/4 of a package of Soyrizo
    • 3 large cloves of Garlic chopped finely
    • 2 tablespoons of Extra Virgin Olive Oil
    • 1 tablespoon of ground Tumeric
    • 1 teaspoon of ground cumin
    • 1 teaspoon of Salt
    • 1/4 teaspoon of black pepper
    • 1/2 of a Jalapeno pepper seeded and finely chopped (optional)
  • Directions

Put olive oil in pan with burner on high and add Onions, garlic, jalapeno, salt and fry for about 2 – 3 minutes. Add in cumin and fry additional 30 seconds Add in tofu and potato and stir around integrating it with the onions garlic and spice and add pepper. Cook for about 4-6 minutes with burner still on high until steaming. Add tumeric and stir around to color tofu. Add Soyrizo and cook until hot stirring around to mix with evenly for another 2 minutes. Serve in tortilla with cheese and salsa (for Vegan leave out the cheese)

Braised Beef Brisket

Juicy Tender Braised Beef Brisket

This brisket really came out good. It was cooked in the oven, and when I took it out, WOW, it smelled great and I had to resist it for about 20 minutes while I let it rest which was torture. I sliced across the grain and it was fall apart tender and had a deep robust beef flavor. Here’s the recipe.

Ingredients

  • 3-4 pound beef brisket fully thawed.
  • 1 1/4 cups of soy sauce
  • 2 cups of beef broth (2 cups of water with 2 tsp bouillon powder will work also)
  • Juice of 1 large lemon, about 1/4 cup
  • 5-6 cloves of garlic finely minced
  • 1/2 tsp liquid smoke

Mix the last 4 ingredients together and add to a ziploc bag. Add in brisket and zip up bag with all the air squeezed out, or as much as you can get out. Put in the refrigerator and marinade for minimum of 45 minutes or up to overnight if you want. I marinaded for 45 minutes since it will cook in the marinade anyway. Put the brisket in a baking pan just large enough for the brisket and add the marinade in the bottom of the pan and cover with foil. Cook in a 300 degree oven for at least 40 minutes per pound. I did longer, I had a 4 pound brisket and cooked it for 4 hours. Let rest for about 20 minutes, then slice across the grain. Make sure and use a sharp knife so it doesn’t break apart while slicing since it will be really tender.


Braised Pork with Roasted Tomatillo Salsa

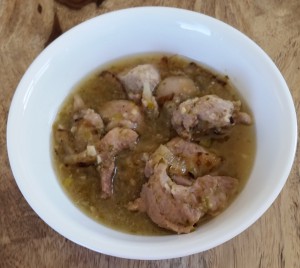
Braised Pork in Roasted Tomatillo Salsa

Rick Bayless gave me this recipe when I asked him what his favorite easy to make Mexican pork recipe was. I made it and it was AWESOME. Here is the recipe:

Ingredients

  • 3 1/2 lbs of Pork shoulder. Cut into approx 1″ cubes
  • 5 tomatillo outer husk pealed off
  • 1/2 of a large white or brown onion chopped (1/2 for browning and 1/2 for salsa)
  • about 6 sprigs of cilantro with the thick bottom stem removed (I used a little more)
  • 1/2 tsp salt, you can add more after you taste it if it is needed.
  • 1 jalapeno pepper, 2 for spicy (tip with stem cut off) I used 2.
  • 4-5 cloves of garlic

Directions

Roast the tomatillos and garlic under the broiler in the oven till spotted with brown and color changes from bright green to olive green color. While roasting the tomatillos roast the garlic also. It will cook quicker though and should be removed before it is black. Add the garlic, tomatillos, half of the onion, jalapenos, salt, and cilantro to a blender or food processor with about 1 cup of water and process till a chunky sauce. Brown the pork in a frying pan, don’t over crowd the pan or you will not be able to brown it quickly. Brown the other half of the onions in the same pan and add it all to a crock pot (pork, onions, salsa) and cook on low for about 8 hours.  I served it with corn tortillas that had been lightly sprayed with a little cooking oil and the briefly fried. You want the tortillas still soft but with some light brown spots.

Well Done Rib Roast

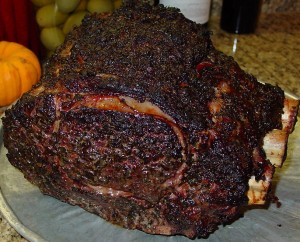
Delicious Well Done Rib Roast

With any Holiday coming up, you will want to cook a special meal. This rib roast is a real treat and will not disappoint your guests. The herbs form a crust on the roast and it is slightly crispy on the outside and tender and juicy on the inside. It will be especially loved by people that don’t want pink in the center of their meat. I have cooked this a number of times and it has always disappeared quickly, so you may have to cook a large one.

Ingredients

  • 3-4 lb Rib Roast
  • 4 tbsp Cracked Black pepper
  • 4 tbsp kosher salt or coarse sea salt
  • 3 tbsp Basil
  • 2 tbsp Rosemary
  • 2 tbsp thyme
  • 2 tbsp granulated garlic

Directions

Thaw rib roast completely and store in fridge till ready to cook. Take out of the fridge sprinkle and massage each ingredient one at a time in and then let set for at least 1 hour at room temp. Preheat oven to 450 and then put in roast and brown uncovered for 20 to 30 mins till outside browned. Turn oven temp  down to 300 and cook for 2.5 hours, then start checking internal temp every 30 mins till it is 140 degrees. Then Remove from oven and tent foil over pan and allow to cool for 30-45 mins, then serve.

Tacos Los Altos, Best Tacos in Flagstaff

20160316_151230 20160316_151233 20160316_151239 20160316_151300

Sometimes the best food comes from the small hidden away restaurants that all the locals know about. I got lucky on my last visit to Flagstaff and found a place such as this. I have made many visits to Flagstaff over the years and have tried a lot of different restaurants there, but these are by far the best tacos I have eaten in the area.  I talked with the friendly owners, he is from California where he met his wife who was originally from Jalisco, Mexico. She told me she used to have her own taco stand there. She brought her recipes over with her and together with her husband opened a taco shop (Tacos Los Altos, Route 66) in Flagstaff and after years of success, they decided to retire, so they sold the restaurant. They soon became restless and decided to open another restaurant so they opened Tacos Los Altos – West Side. I have tried both restaurants and I like the food from the one run by them best (the West Side Location). My favorite menu item and their most poplar is the street tacos (Mini Tacos) and my favorite meats on them are the Carne Asada, the Adobada, and the Tripas. The Carne Asada is amazingly tender and juicy with a pleasant flavor from her special marinade. The Adobada is one of the best I have tasted, it has the great taste that Adobada marinade brings to the meat, but it is not too salty like most of them that I tried are. It is cooked so that the small chunks of meat have a slight char which imparts a great caramelized taste that blends in with the marinade and adds complexity to the taco’s flavor. The Tripas has no bitter taste, which I have have tasted in some that are not prepared correctly, and it is delightfully crunchy. They will ask how you like it prepared (crunchy or not). I really liked the spicy and flavorful red and green taco sauces from their salsa bar the best. They enhanced the flavor of the tacos, although the tacos were tasty enough on their own to be eaten without it. I usually don’t eat the Lengua tacos, but since it is popular with their customers, I decided to try it, and well I wasn’t disappointed, it also was very good. The meat was tender and had a deep beefy flavor. I ate so many of their tacos that I couldn’t cover any more of their menu, however I will look forward to going through more of it in future visits. If you are in Flagstaff for any reason, or live in Flagstaff, you need to add a visit to Tacos Los Altos into you agenda. Once you try it you will be hooked as I am. Here is the Location:

Tacos Los Altos (Google Maps Link)
2500 S Woodlands Village Blvd #1
Flagstaff, AZ 86001
 

Making Fresh Pasta

Fresh Pasta
Fresh Pasta

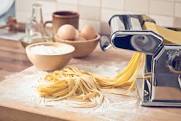
Making fresh noodles takes some work, especially because you have to make twice the amount since everyone will want to eat much more than if they were dried noodles, but the result is always worth it. I often make them and yes they disappear quickly.

Ingredients

  • 2 cups of all purpose flour
  • 3 eggs
  • 1/4 tsp salt
  • 1 tsp olive oil

Directions

On a large cutting board, pour flour into a pile and use your fingers to poke down in the center and form a crater, so it looks like a volcano. Break eggs one at a time in the crater you formed and use a fork to start mixing the flour with the egg until the flour absorbs the egg and don’t break the side of the flour pile or the egg will run out. After you mixed in the first egg put in the second until all 3 eggs are incorporated. then knead the dough for about 5 minutes until well mixed. Wrap in saran wrap and put in the refrigerator for 30 minutes to rest. If you have a pasta roller (like HomeStart HST5018 Pasta Maker) you can use this to roll the dough.

With Pasta roller: Start at the thickest setting. Cut the dough into thirds and roll one piece through fold and roll through again 4 times. Go down one setting and fold and roll through the pasta maker. Do this 3 more times. Now go down 1 setting at a time folding over before rolling dough but only go through 1 time now till you are down to the thickness you want. Now flour both sides of the pasta sheet and run through the cutter onto a dish and toss in flour.

Without Pasta roller: Separate the dough into thirds. Use a rolling pin to roll the dough out into a sheet on a floured cutting board. Fold over and repeat 7 times. Now roll to thickness you want. Add a lot of flour to the pasta sheet and roll up. Now with a sharp knife cut the end of the roll into the width noodle you want and repeat until the roll is cut. Unroll and toss in flour.

Then cook for 3 – 5 minutes in boiling water. Serve as spaghetti, or in soups, etc.